
Getting your computer ready
If you are just starting the class or get a new computer, here are the steps you need to get all of the software installed for this class:
Install Miniconda3
Miniconda is a Python package manager. It helps us install python and the various packages we will use in the course.
Download Miniconda here: https://docs.conda.io/en/latest/miniconda.html
Windows Users
You probably want the 64-bit installer (unless your computer is older than you are…)
Mac Users
In Fall 2021, Apple started building laptops with M1 processors instead of Intel processors.
You can determine which kind of processor you have by clicking the Apple icon at the top left of your screen, then “About This Mac”
- If the chip section says “Apple M1” in it, you have an M1 processor
- If it doesn’t, you have an Intel (x86) processor
Select the pkg installer that corresponds to your processor.
Miniconda Installation
The miniconda installer will ask you some questions. You can accept all the default settings.
Install PyCharm
https://www.jetbrains.com/pycharm/download/
As a BYU student, you can get a FREE educational license from JetBrains in order to use the professional version of their products.
Or, you can install the Community Edition.
Either edition (professional or community) will work fine for this class.
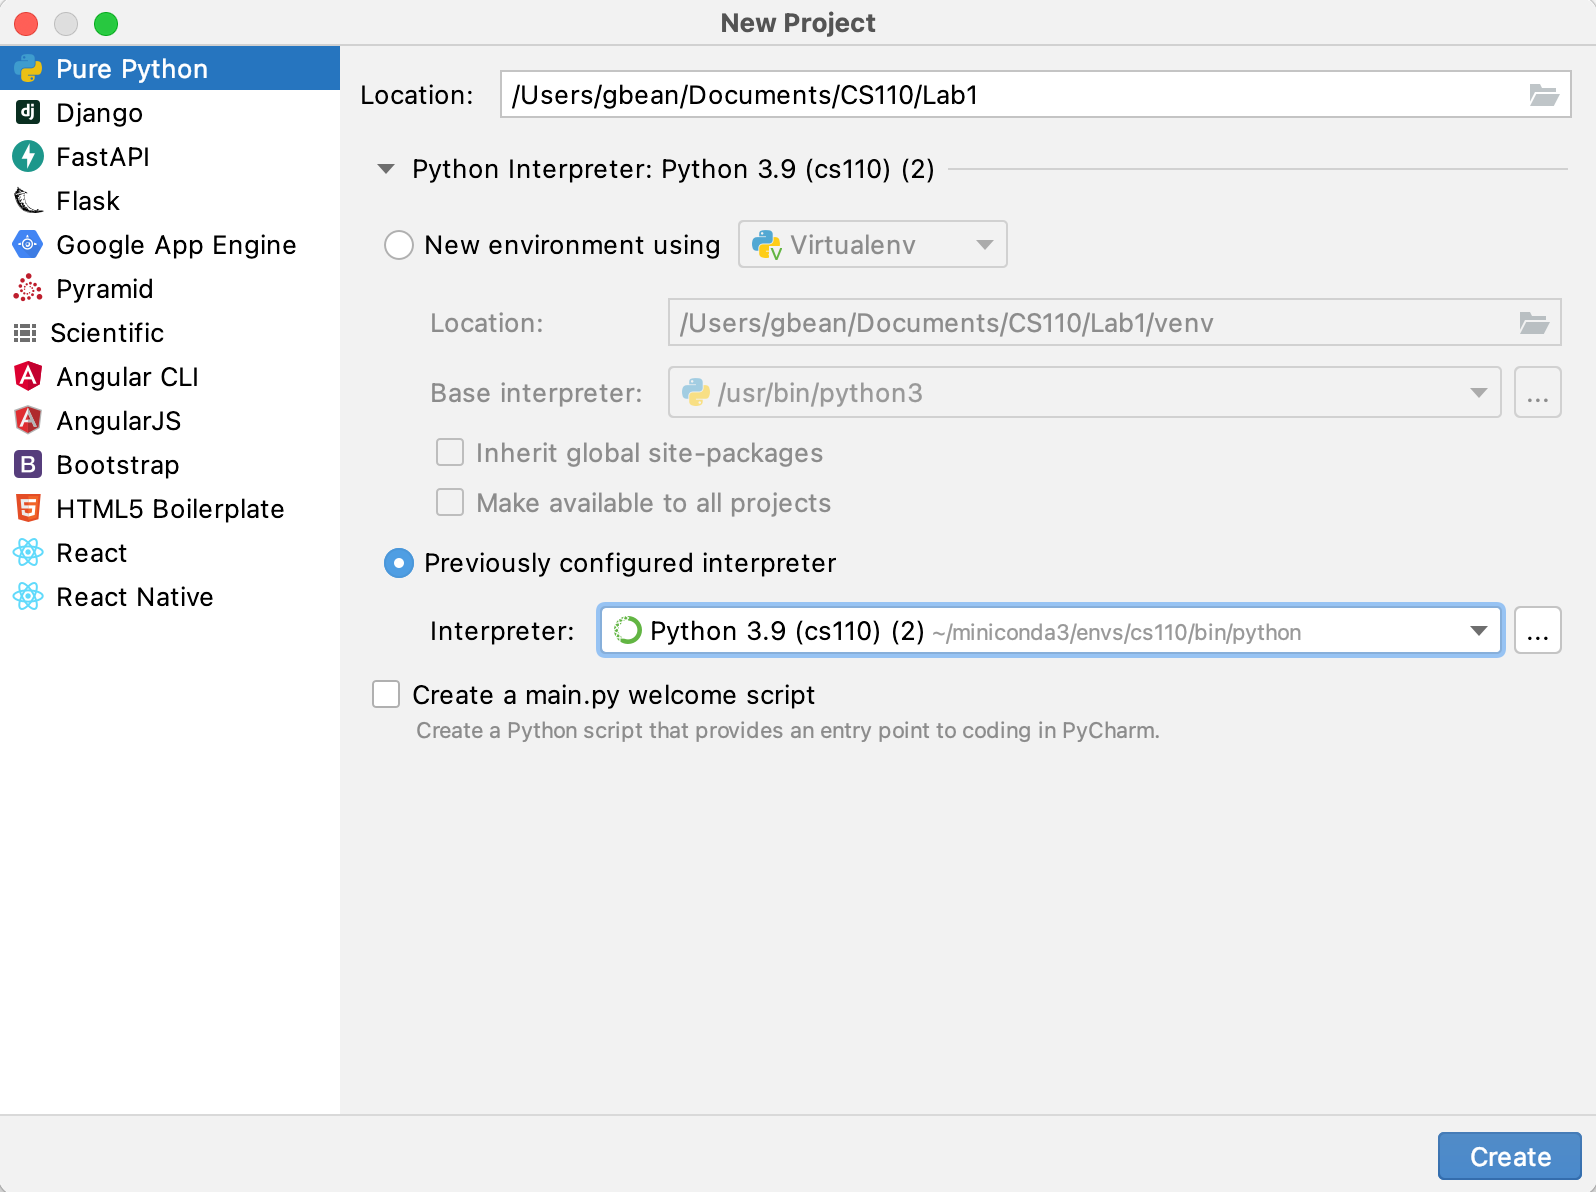
Create a PyCharm project
Once you have PyCharm installed, do the following:
-
Open PyCharm.
-
Create a new project.
There are two things you need to tell PyCharm about your project:
a) Where should it store your files b) Which version of Python should it use
First specify the location for your project.
- Click the Folder icon on the right to browse your folders.
- Create a folder called “CS110”.
- In the CS110 folder, create a new folder call “Lab1” (no spaces!).
- Select “Open” to use the new Lab1 folder.
Second, specify the version of Python to use.
- The first time you use PyCharm, you will need to configure the environment we
created earlier (called
cs110) - Click the triangle next to “Python Interpreter” to expand the interpreter settings
- Select “Previously configured interpreter”
- If the
cs110environment is not visible, we need to configure it in PyCharm- Select the
...icon on the right - Select “Conda Environment” on the left
- In the “Interpreter” field, select the “cs110” option (the example below
shows an environment named
jupyter) - Select the checkbox “Make available to all projects”
- Select “OK”
- Select the
- Now select the
cs110environment for you project’s Python interpreter.
- If the
Third, unselect the “Create a main.py welcome script”
Fourth, select “Create”.
From now on, create now folders inside the
CS110folders, e.g. forLab2,Lab3, andProject1. If you use this same project, you won’t have to worry about redoing any of the configuration you just did.
Example: creating a new project in PyCharm
Example: configuring a Conda Environment in PyCharm

Terminal
Windows Users
Use the “Anaconda Power Shell (PS) Terminal”
Note: you will also find an “Anaconda Prompt”. That’s not the one you want. You will also see a “Power Shell”. That’s not the one you want. Look for the one with both “Anaconda” and “Power Shell” in the name.
Mac Users
Use the built-in Terminal app or install iterm2.
Create a conda environment
Using the terminal, create a conda environment named cs110:
conda create -n cs110 matplotlib pyqt==5.15.7 pillow pytestActivate this environment:
conda activate cs110Now install some of our software:
pip install -u byu_pytest_utils
pip install -U byubit